How It Works #
- The Candidate reaches the Invoice Step.
- The system generates an invoice automatically.
- The invoice is delivered (via email, Runner, or documents).
- The Candidate can view or download the invoice.
- Admin can track and manage payment status.
- The Journey continues.
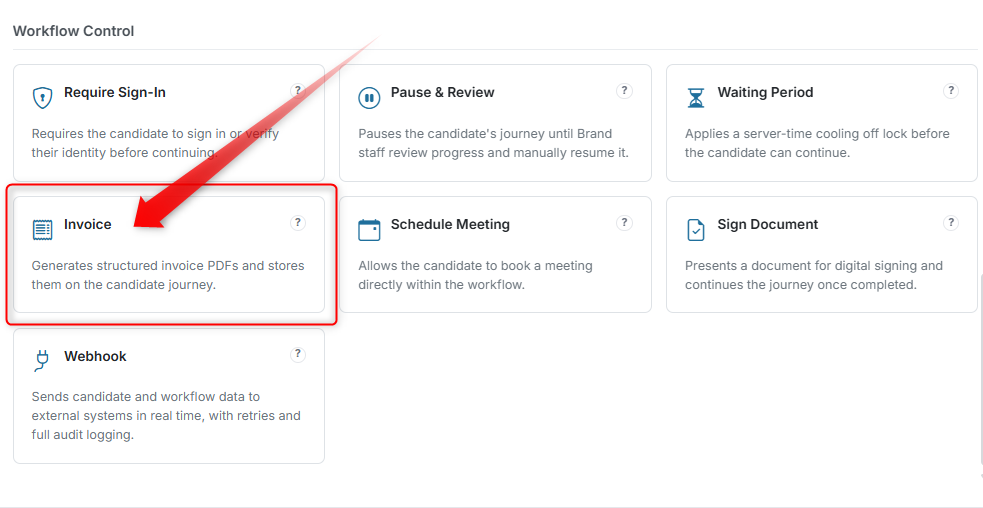
How to Configure #
- Open your Agent in the Agent Editor.
- Go to Path Steps.
- Click Add Step → select Invoice.
Configure Invoice Header #
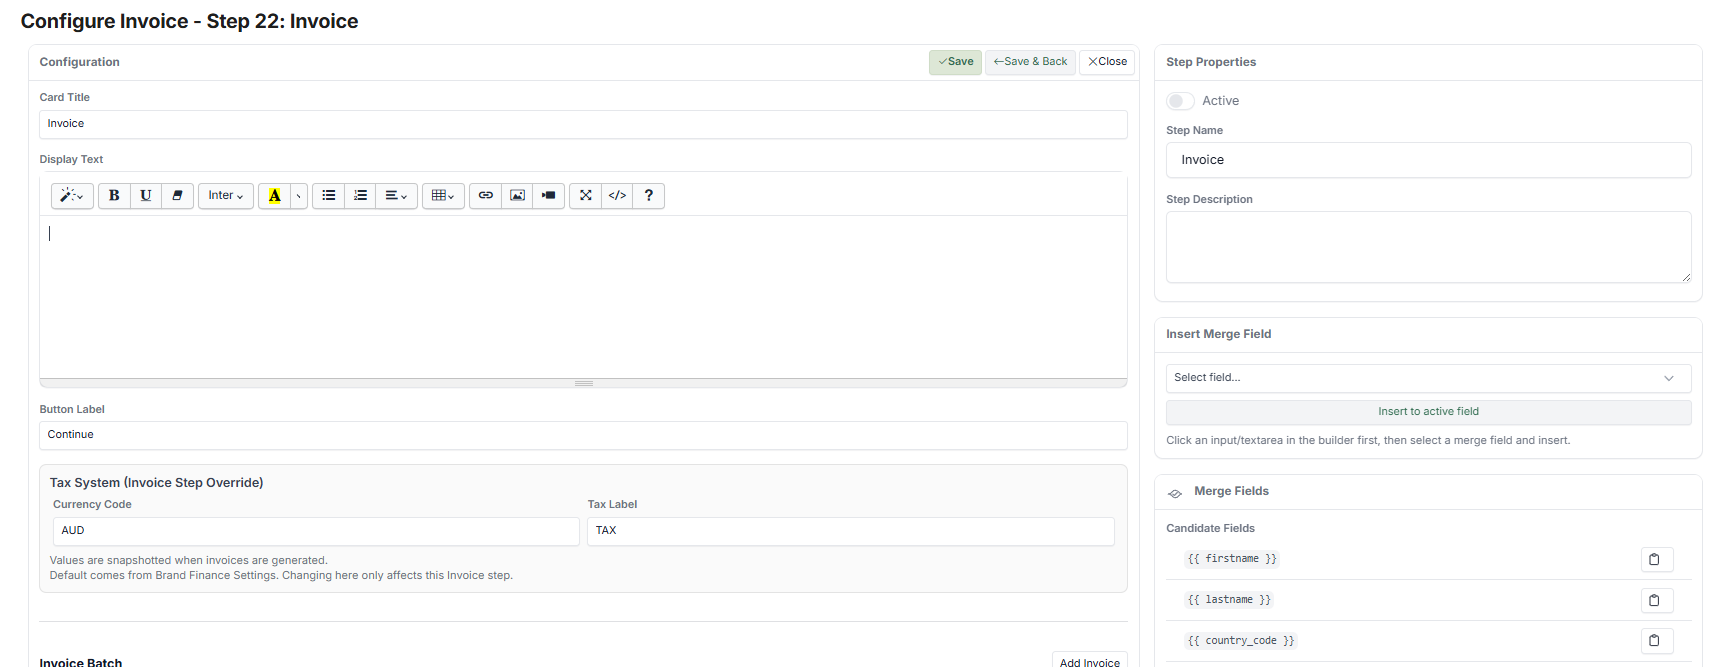
- Set Invoice Title (e.g., "TAX INVOICE")
- Add Logo URL (optional — your company logo)
- Set Invoice Date Mode (when the invoice is dated)
- Set Due Date Mode (e.g., offset days from invoice date)
Configure Sender (From) #
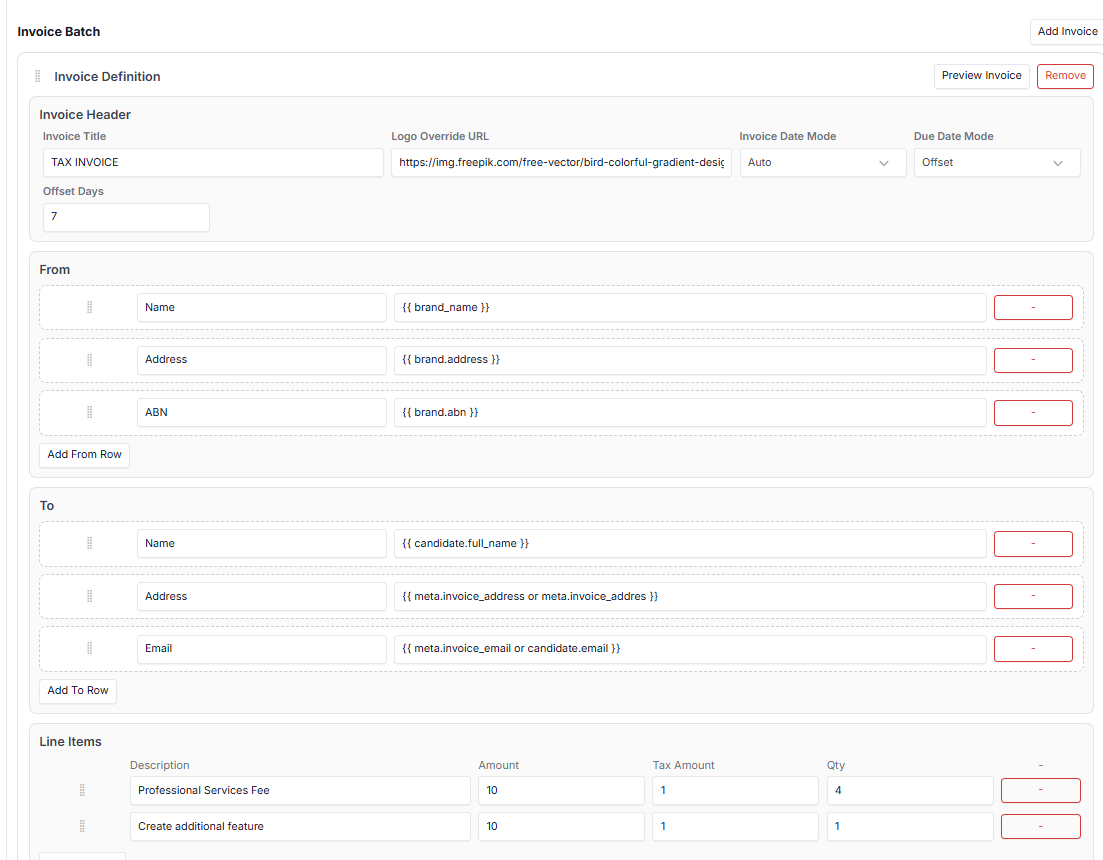
- Name → Use Merge Fields, e.g., {{ brand_name }}
- Address → Use Merge Fields, e.g., {{ brand.address }}
- ABN / Company details → Your business registration number
Configure Recipient (To) #
- Name → Use Merge Fields, e.g., {{ candidate.full_name }}
- Address → Dynamic fields from the Candidate record
- Email → Use Merge Fields, e.g., {{ candidate.email }}
Add Line Items #
For each item on the invoice:
- Description (e.g., "Professional Services Fee")
- Amount (e.g., 50.00)
- Tax (e.g., GST 10%)
- Quantity (e.g., 1)
Payment Block #
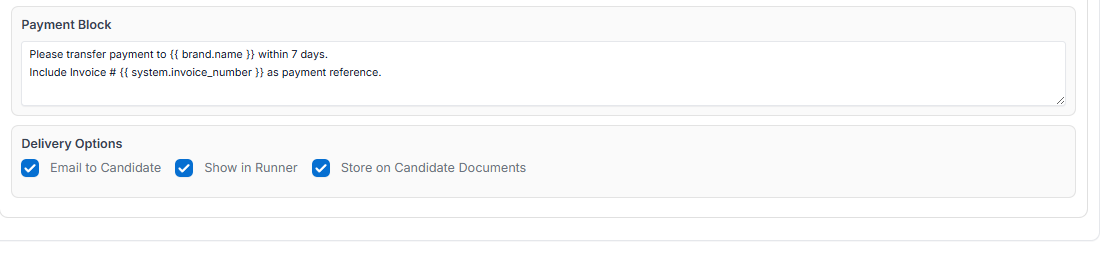
Add payment instructions. Example:
"Please transfer payment to {{ brand.name }} within 7 days. Include Invoice # {{ system.invoice_number }} as reference."
Delivery Options #
Choose how the invoice is delivered:
- Email to Candidate — Send the invoice via email
- Show in Runner — Display the invoice in the Journey interface
- Store in Candidate Documents — Save the invoice to the Candidate's document storage
- Click Save.
What the Candidate Sees #
Step 1: Invoice Display #
The Candidate sees a summary:
- Invoice title (e.g., "TAX INVOICE")
- Invoice number (e.g., #1006)
- Status (e.g., "Issued")
- Total amount (e.g., AUD 55.00)
Step 2: Download Option #
The Candidate can click Download PDF to open the full, formatted invoice document.
Step 3: Continue Journey #
The Candidate clicks Continue and the Journey proceeds.
My Documents #
The invoice is also stored under the Candidate's My Documents section for future reference.
What the Admin / Reviewer Sees #

Invoice Generated #
- Status shows: Invoice Issued
- Total number of invoices is tracked per Candidate
Invoice Management #
Admin can:
- View the invoice
- Download the PDF
- Edit the invoice (if allowed)
- Mark as Paid
- Cancel the invoice
Payment Tracking #
- Status updates: Issued → Paid / Cancelled
- Payment history is maintained in the Candidate record
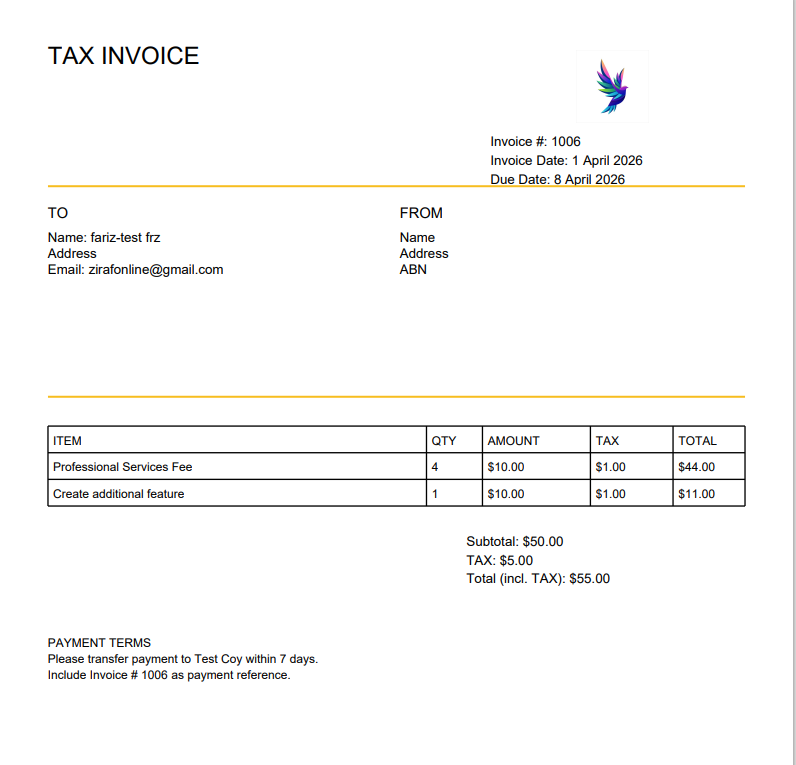
Example #
Scenario: Generate a tax invoice for a professional services fee.
Invoice Setup:
- Title: TAX INVOICE
- Item: Professional Services Fee
- Total: AUD 55.00
- Due: 7 days from invoice date
Candidate View:
- Sees invoice summary
- Downloads PDF
- Continues the Journey
Outcome:
- Invoice is automatically generated and delivered
- Payment tracking is centralised
- Both the Candidate and Admin have visibility
Tips #
- Use clear and professional invoice titles
- Always include payment instructions
- Keep line items simple and transparent
- Use Merge Fields for dynamic sender/recipient details
Notes #
- Invoice numbers are system-generated (auto-incremented)
- PDF is auto-formatted based on your configuration
- Works well for onboarding fees, service payments, or subscription charges