How It Works #
- The Candidate reaches the Sign Document Step.
- A document is prepared for signing.
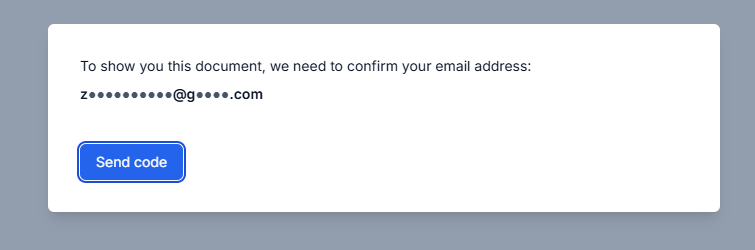
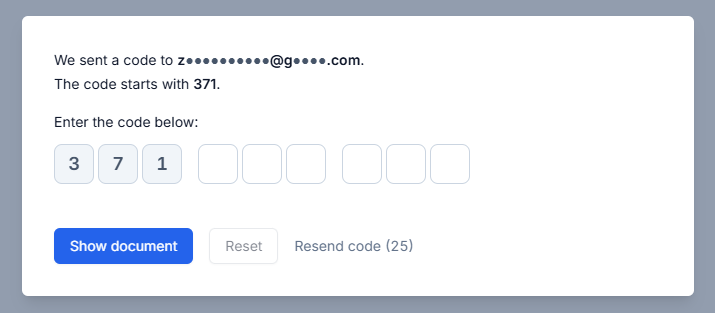
- The Candidate verifies their identity (via OTP).
- The Candidate reviews and signs the document digitally.
- The document is finalised and stored.
- The Journey continues to the next Step.
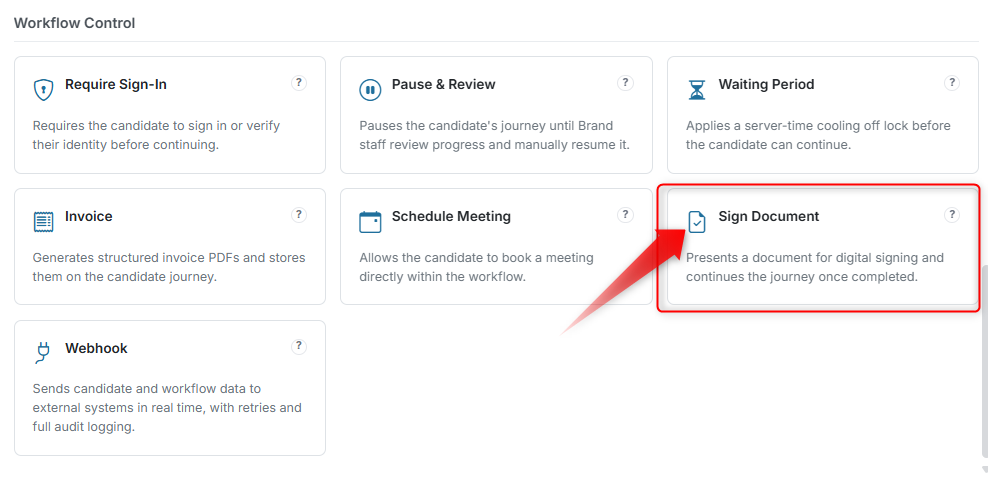
How to Configure #
Basic Setup #
- Open your Agent in the Agent Editor.
- Go to Path Steps.
- Click Add Step → select Sign Document.
 4. Enter your Display Text.
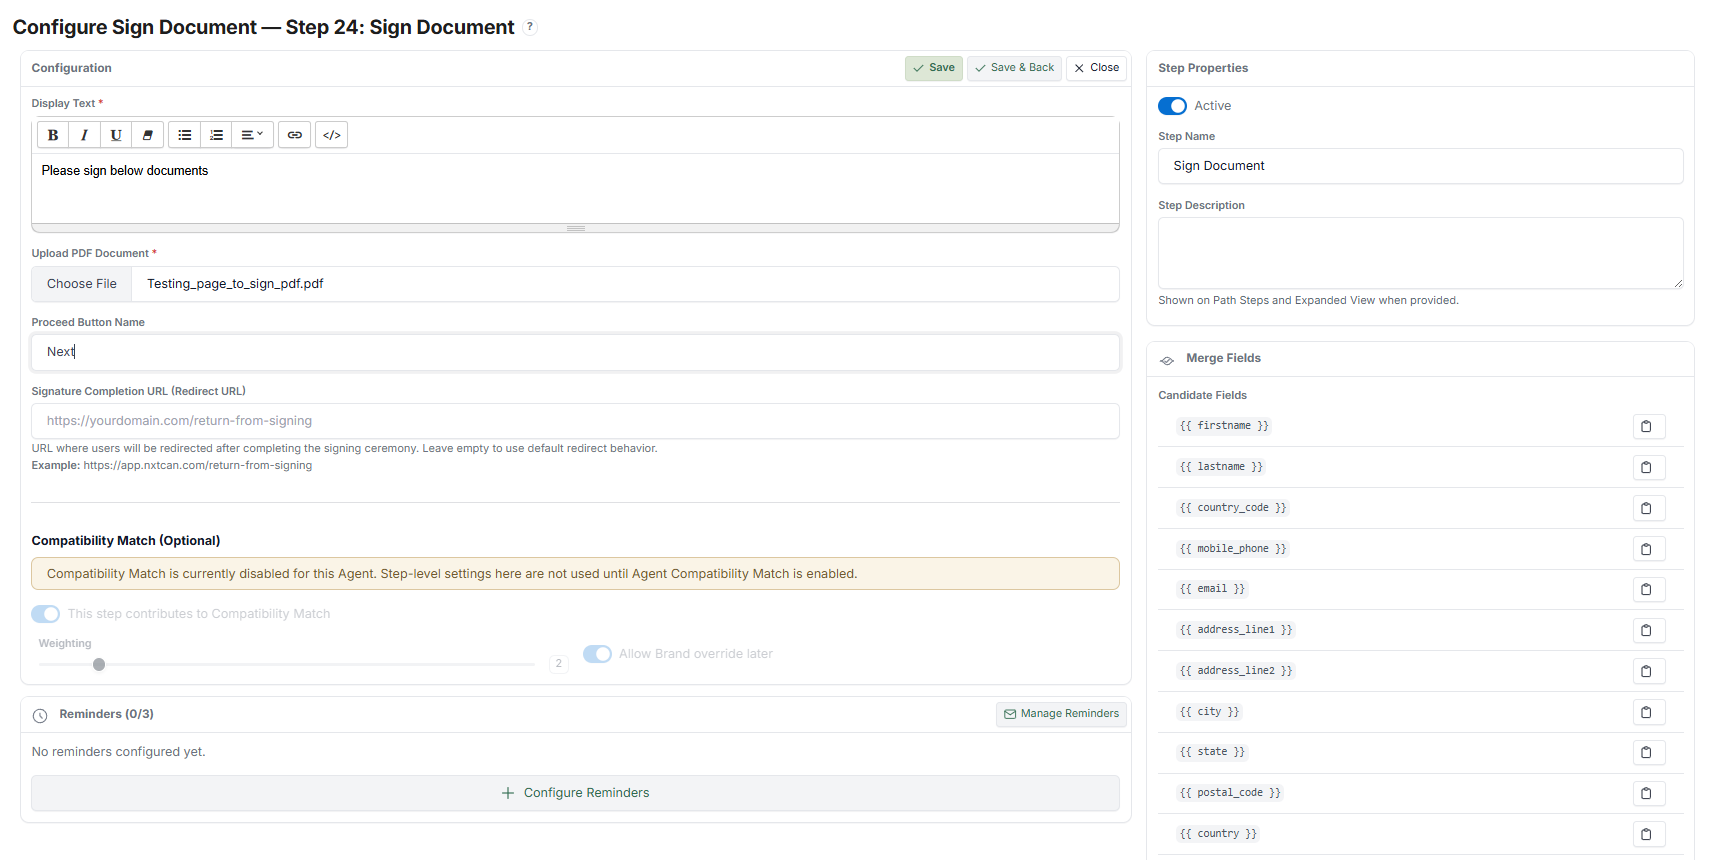
Upload Document #
- Upload the PDF document.
> Important: After uploading the document, you must click Save first. This registers the document and enables the Template Editor.
Prepare Document Template #
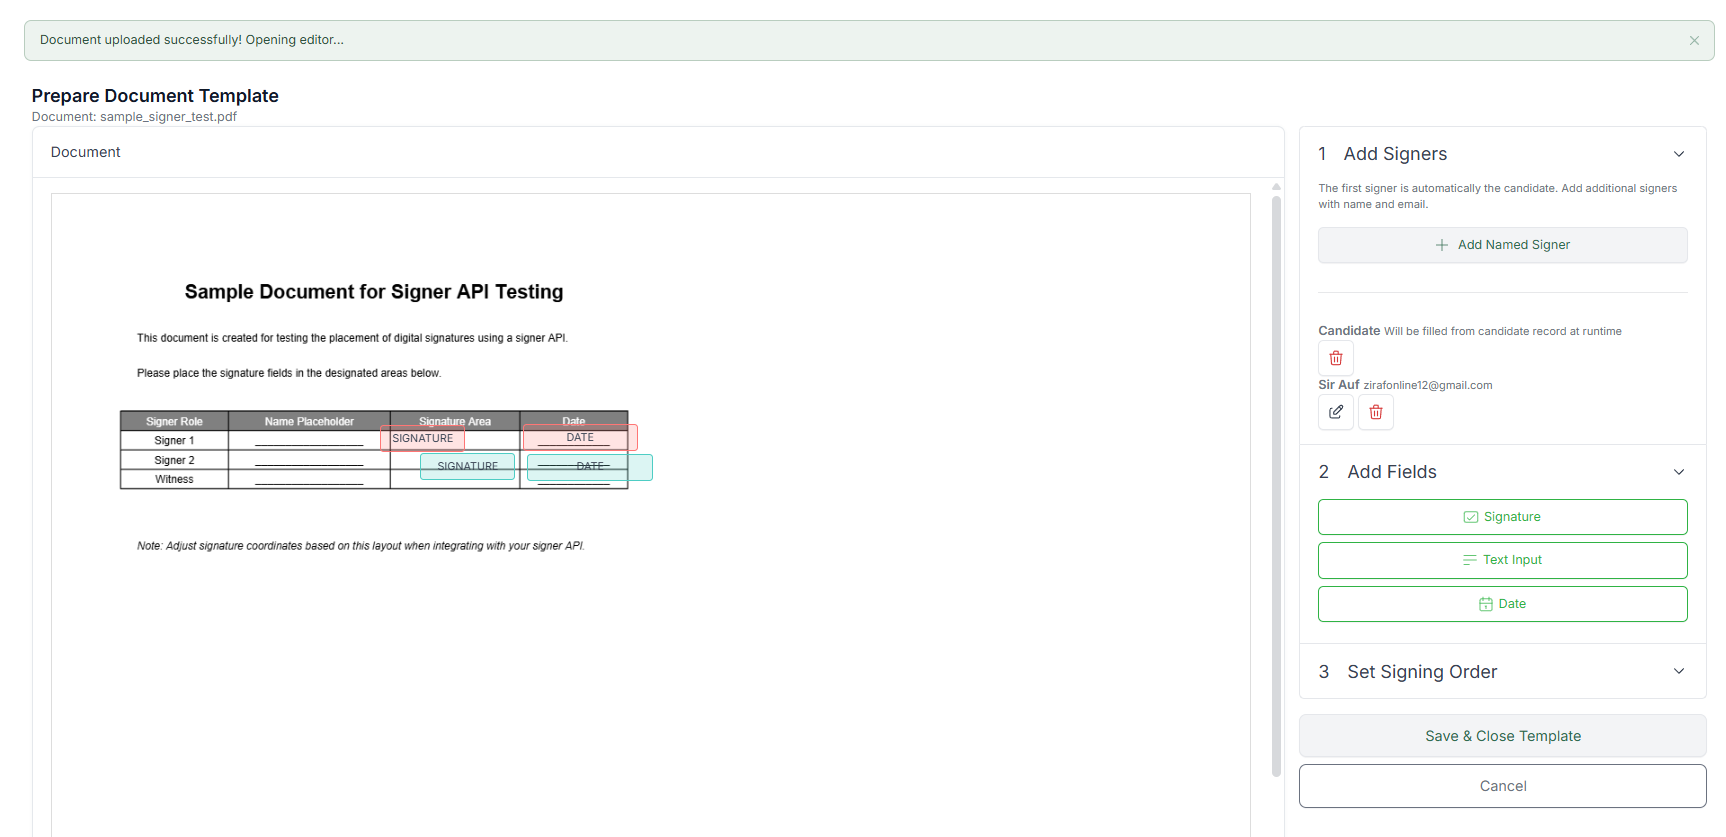
Configure Signers #
- Signer 1 → Candidate (auto-filled based on Journey data).
- (Optional) Add an additional signer if multiple parties need to sign.
Optional Settings #
- Add a Redirect URL after signing (where the Candidate goes after completion).
- Configure Reminders (email timing and message for unsigned documents).
Final Step #
- Click Save to apply all configurations.
What the Candidate Sees #
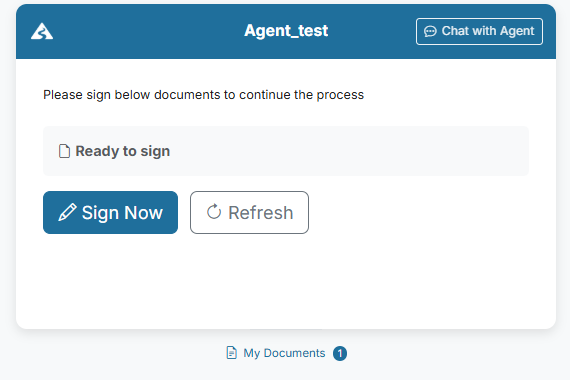
- Sees a "Ready to sign" message.
- Clicks Sign Now.
- Verifies their email via OTP (one-time code).
- Reviews the document.
- Signs digitally.
- Clicks Finish / Next to continue the Journey.
How the Runner Handles Signing #
- Requires OTP verification before the Candidate can access the document
- Locks the document after signing (prevents changes)
- Prevents duplicate signing
- Supports multi-signer flows (if configured)
What Admin / Reviewer Sees #
From the Candidate record, admins can:
- Track document status (Sent / Signed)
- View or download the signed document
- Monitor signer activity
Example #
Scenario: The Candidate must sign an employment agreement before onboarding continues.
Flow:
- Candidate receives the document
- Candidate verifies identity and signs
- Signed document is stored in the Candidate record
- Journey continues to the next Step
Tips #
- Always Save after uploading the document before editing the template
- Place signature fields clearly on the document
- Use Reminders to reduce drop-off on unsigned documents
- Place Require Sign-In before this Step if additional identity verification is needed
Notes #
- Requires a valid email or phone number for OTP verification
- Uses an external e-signature provider
- Signed documents are stored in the Candidate record and can be downloaded