Watch Video #
[Video coming soon]
Follow this walkthrough to see how an Agent is created and tested in just a few minutes.
Prerequisites #
Before you begin, ensure you have:
- An active Zirpa account (start a 7-day free trial if needed)
- At least one Brand configured in your account (see Account & Admin Settings)
- Familiarity with Core Concepts (Candidate, Agent, Step, Path, Journey)
1. Create an Agent #
- Go to the Agents section from the left-hand menu.
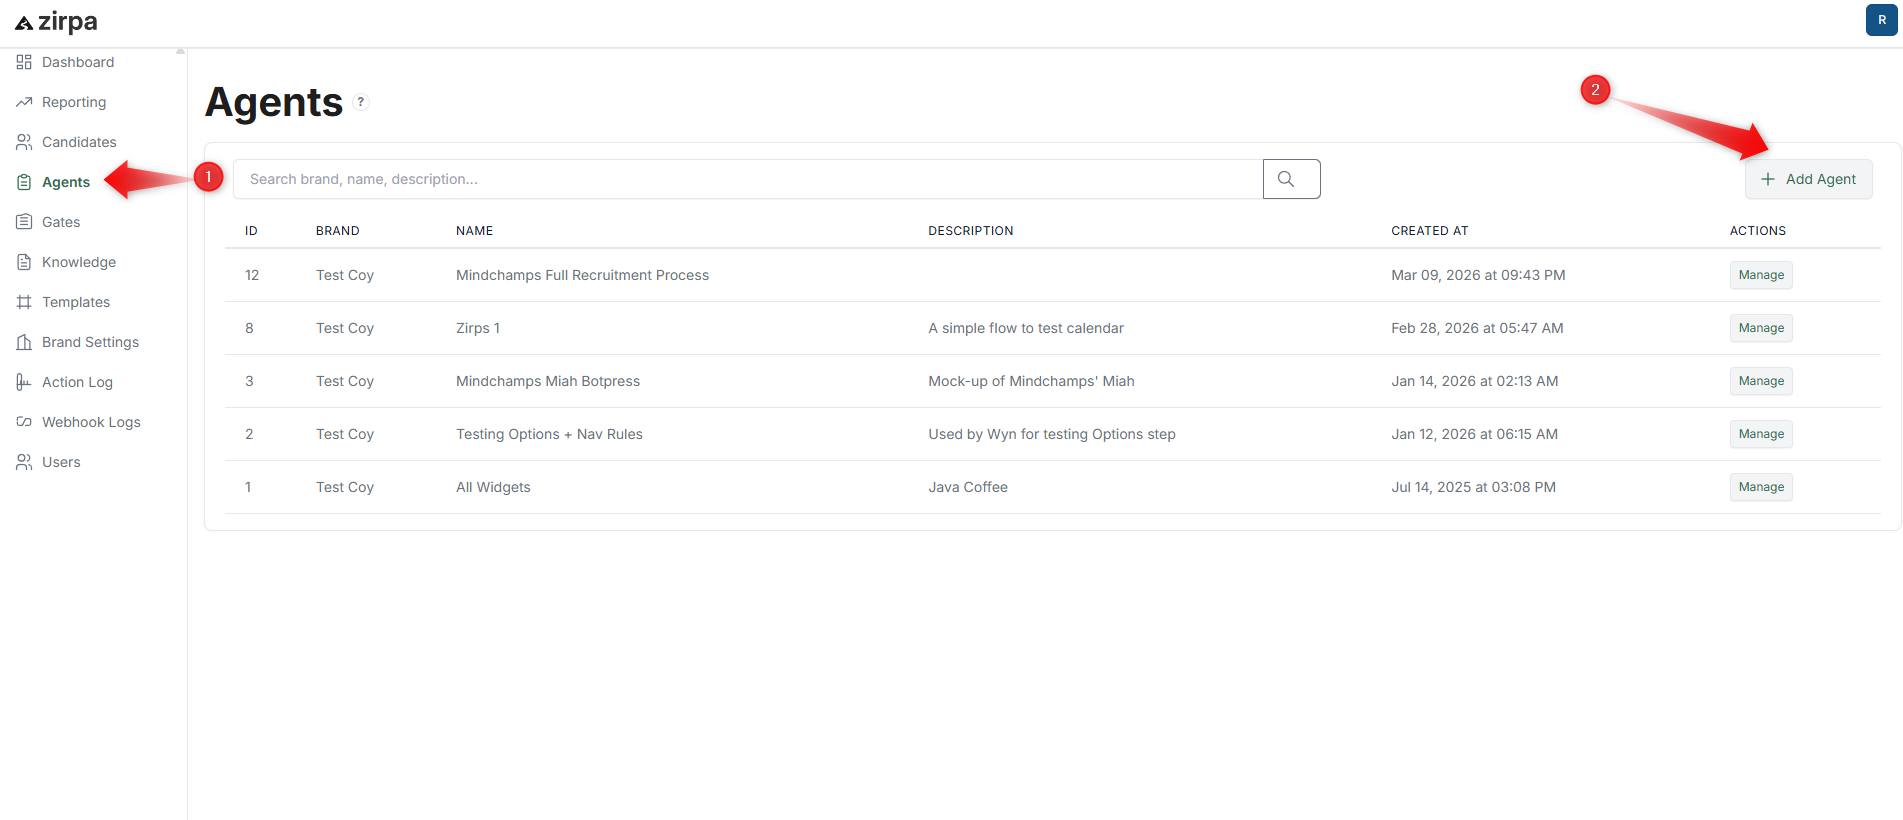 2. Click Add Agent.
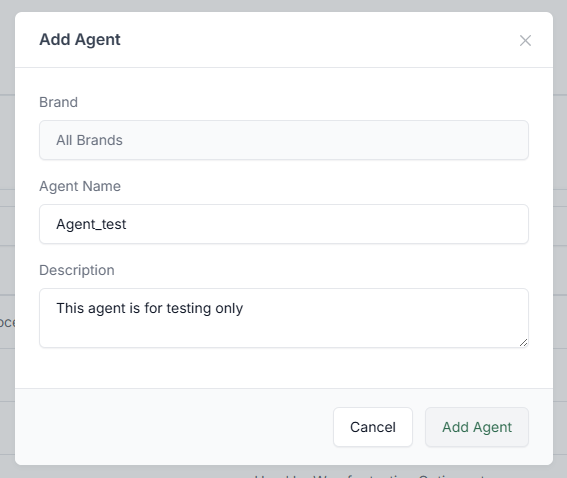
- Enter the required details:
- Select a Brand
- Enter an Agent name
- (Optional) Add a description
- Click Add Agent to save.
The system creates your Agent and displays it in the Agents list. The Agent is now ready to be configured with Steps.
2. Open the Path Steps Section #
- In the Agents section, locate your new Agent.

- Click the Manage button on the right side of the Agent row.
- Scroll to the Path Steps section.
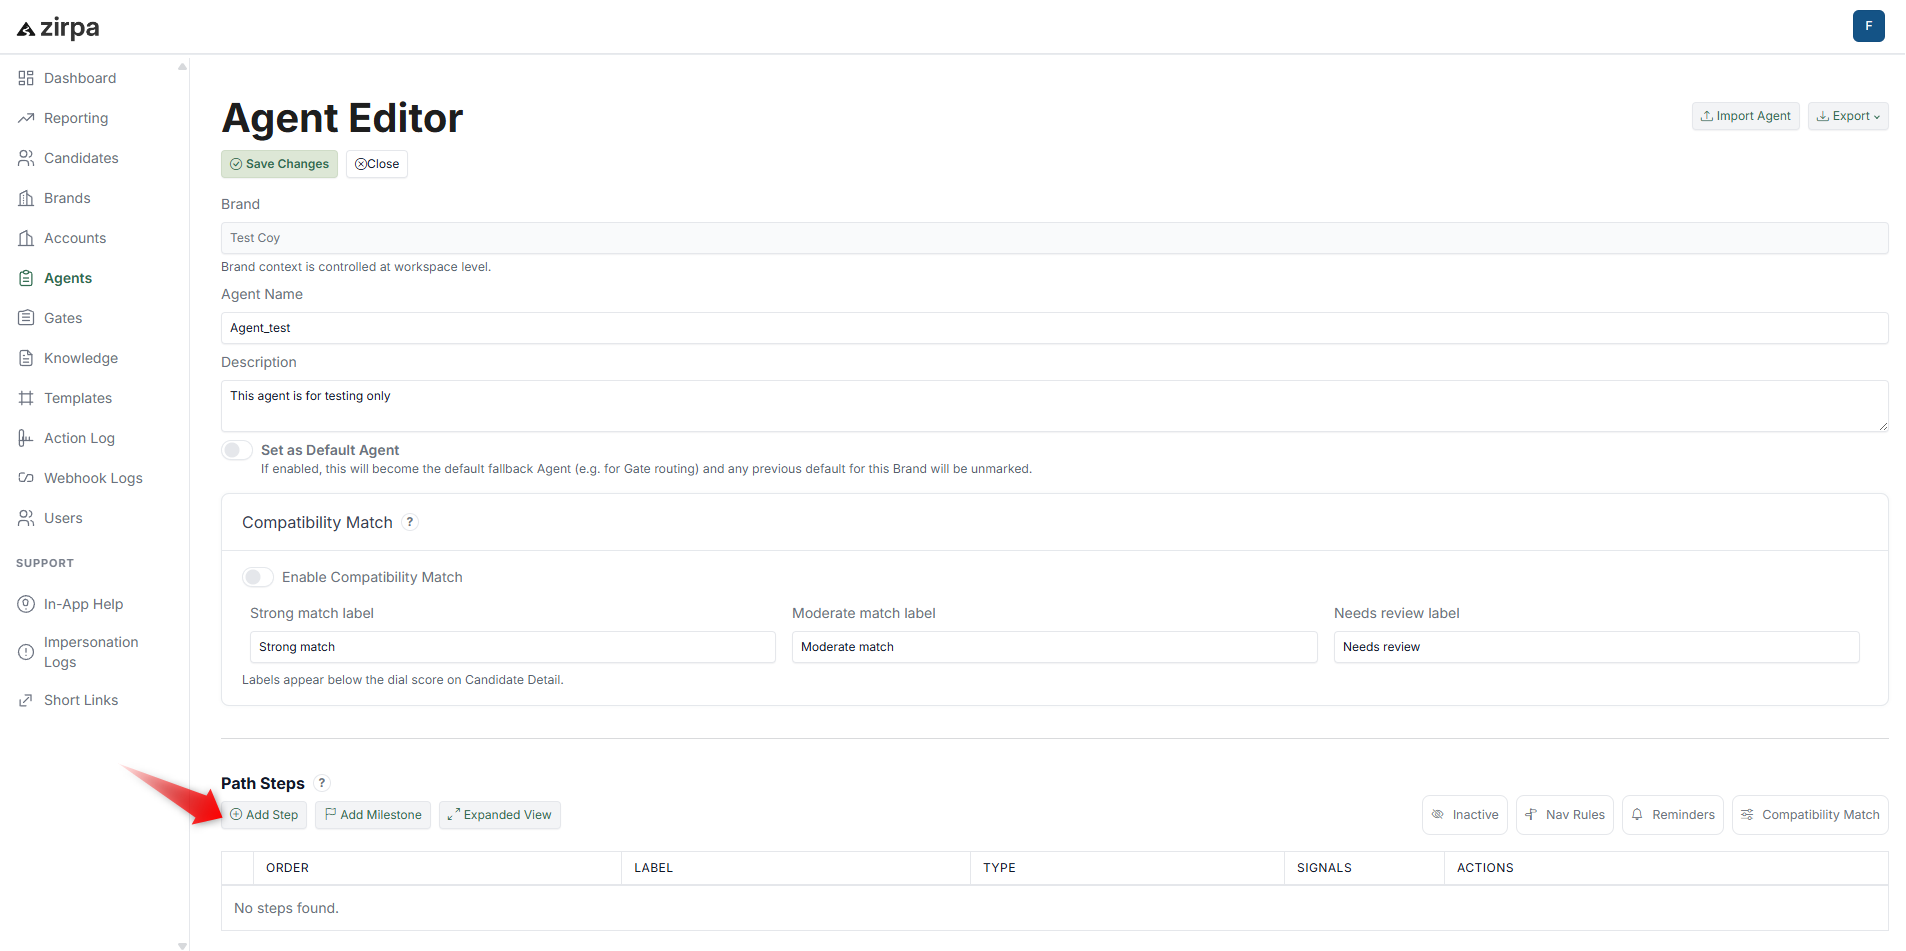
The Path Steps section is where you define the structure of your flow. Here, you can:
- Add and organise Steps
- Control the order of each Step
- Adjust how Candidates move between Steps
You can also configure additional behaviour such as:
- Nav Rules to control Step transitions or branching
- Reminders to follow up with Candidates automatically
- Compatibility Match to evaluate Candidates based on criteria
Start by adding a few Steps first. You can refine the flow later.5. Click Personal Details to add a pre-built form block.
3. Add Steps #
Add at least three Steps to create a basic flow. Use the structure below as a starting point.
Step 1: Introduction #
Use this Step to welcome the Candidate and set expectations.
- Click Add Step.
- Choose Text & Confirmation.
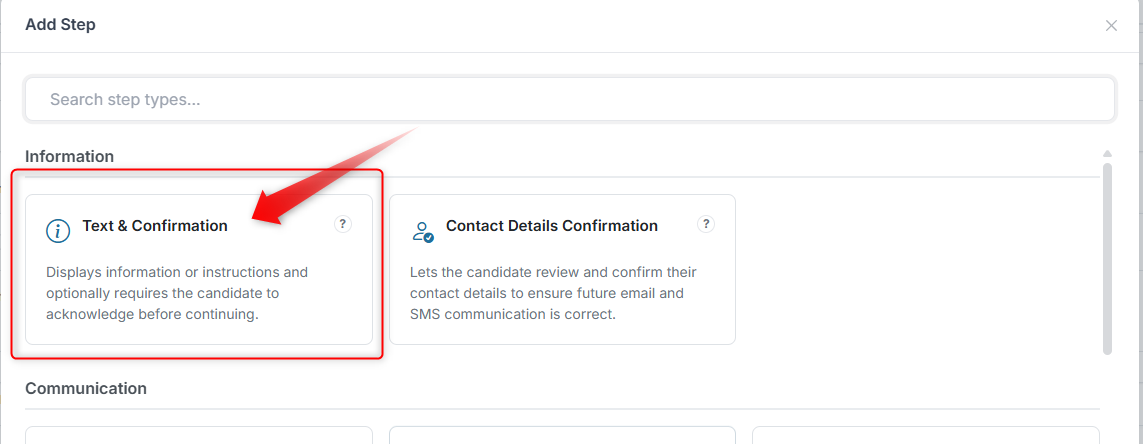
- Add a message such as: > Welcome! This short process will guide you through a few quick steps.
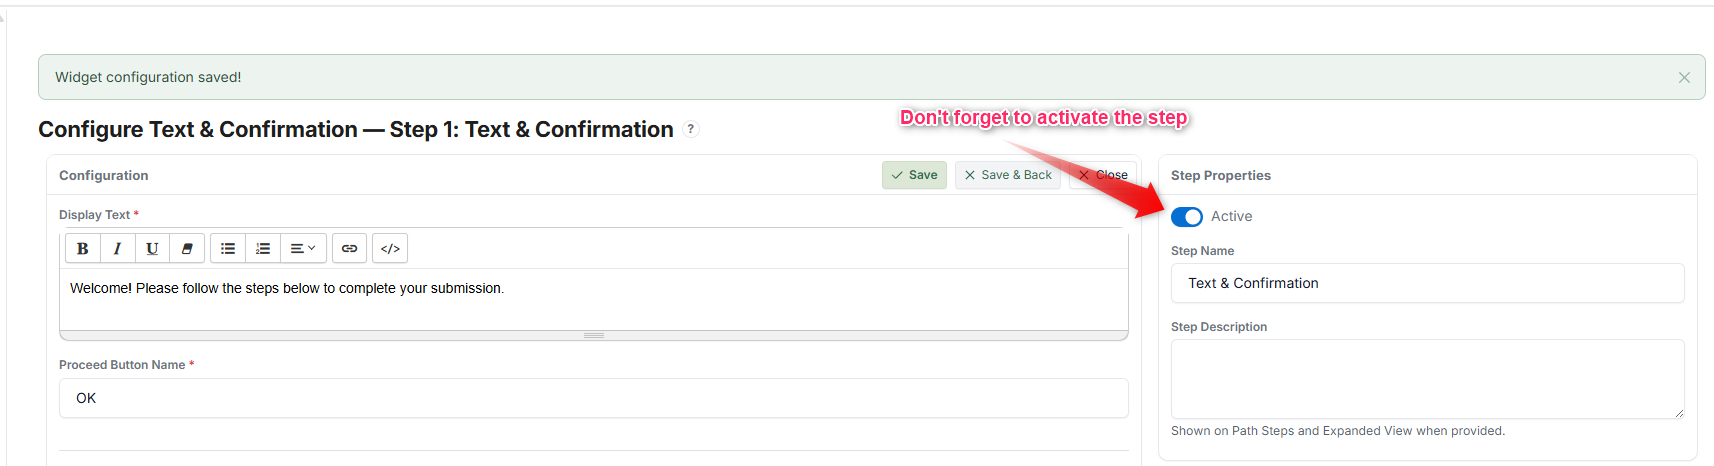 4. Slide status step to Active and then click Save.
The Step appears in your Path Steps list.
Step 2: Basic Information #
Use this Step to collect simple details from the Candidate.
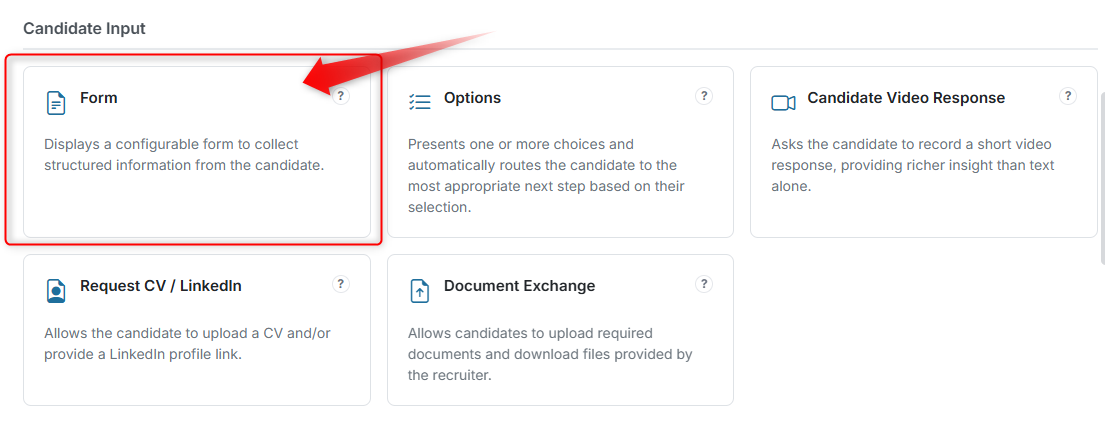
- Click Add Step.
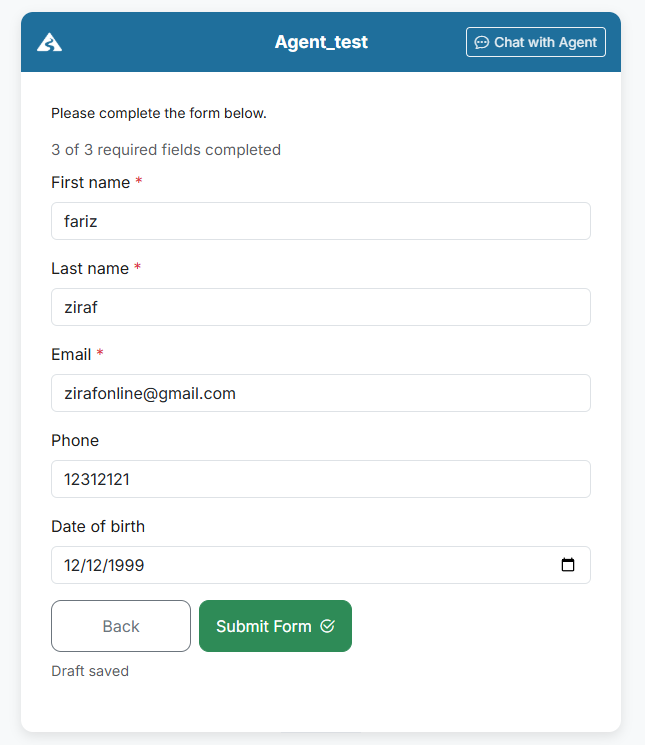
- Choose Form.
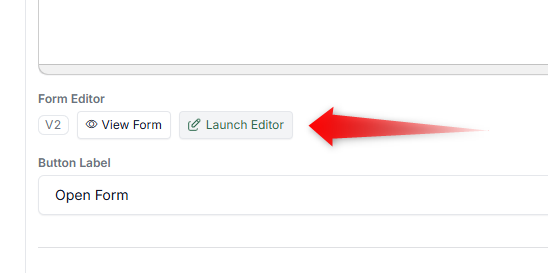
 3. Click Launch Editor.
 4. In the Form Editor, go to the Blocks section.
- Click Personal Details to add a pre-built form block.
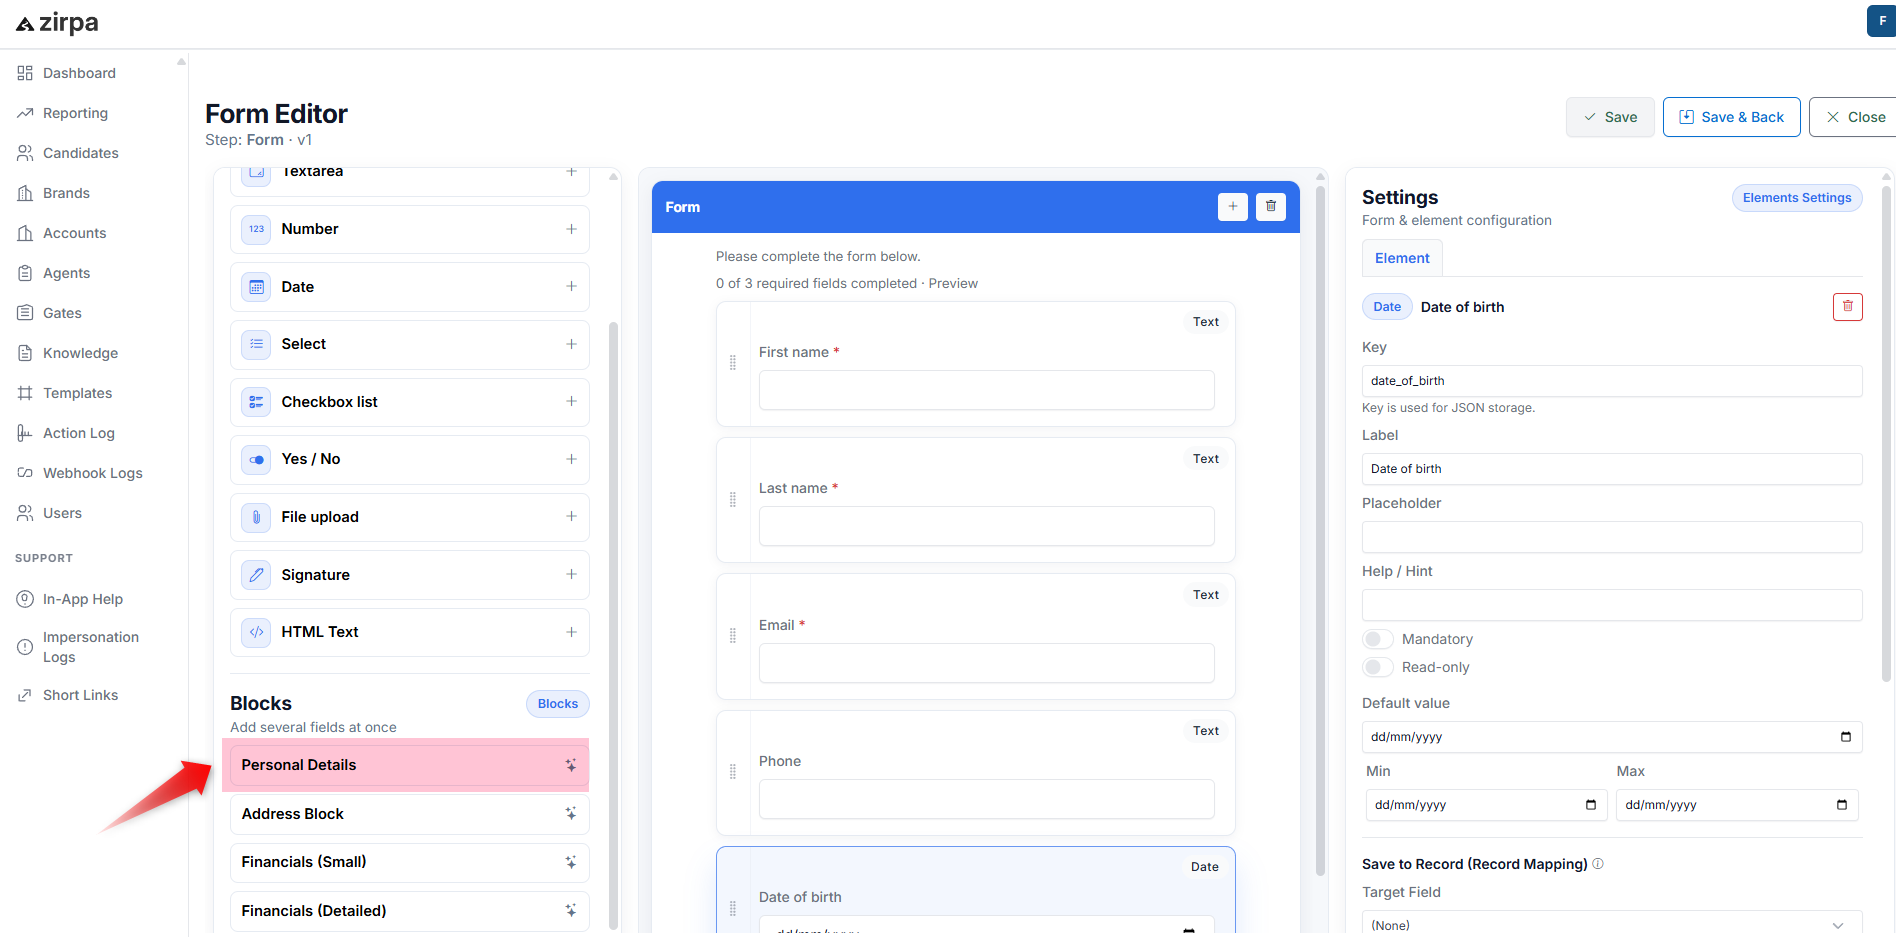
The system adds common fields automatically:
- First name
- Last name
- Phone
You can remove or adjust fields as needed.
- Click Save.
This Step collects basic information without requiring you to build the form from scratch.
This Step quickly collects basic information without needing to build the form from scratch.
Step 3: Confirmation #
Use this Step to confirm submission and complete the flow.
- Click Add Step.
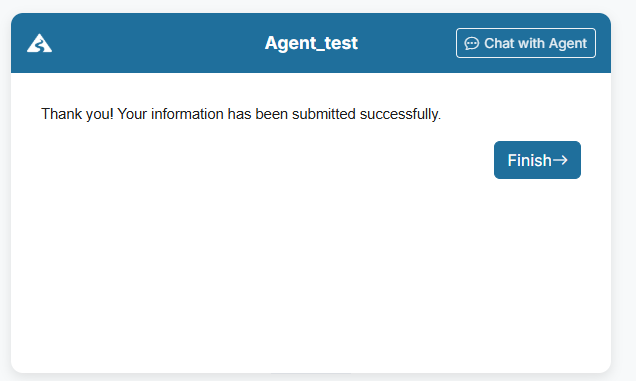
- Choose Text & Confirmation.
- Add a message such as: > Thank you! Your information has been submitted successfully. Our team will review your details and get back to you soon.
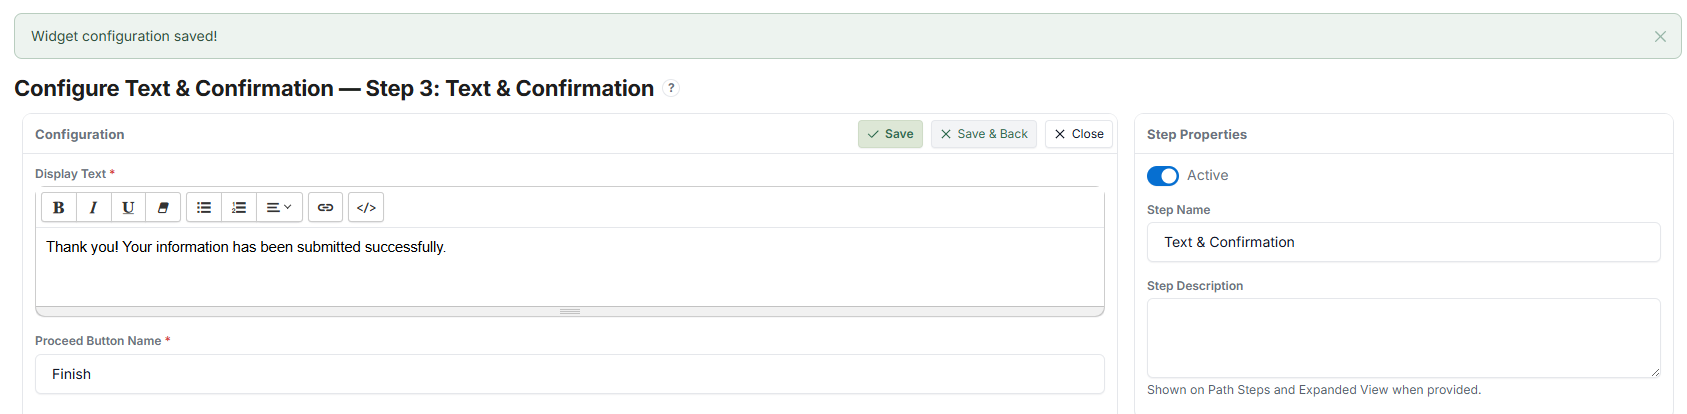 4. Click Save.
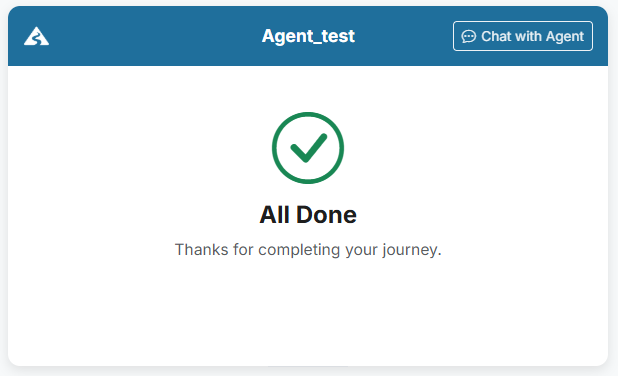
This Step marks the end of the flow. The Candidate sees the confirmation message after completing all previous Steps.
4. Assign a Test Candidate #
- Go to the Candidates section from the left-hand menu.

- Click Add Candidate to create a new Candidate, or open an existing one.
- In the Candidate page, locate the Brand & Agent section on the right-hand side.
- Select:
- The Brand you chose in Step 1
- The Agent you created
- Save the Candidate record.
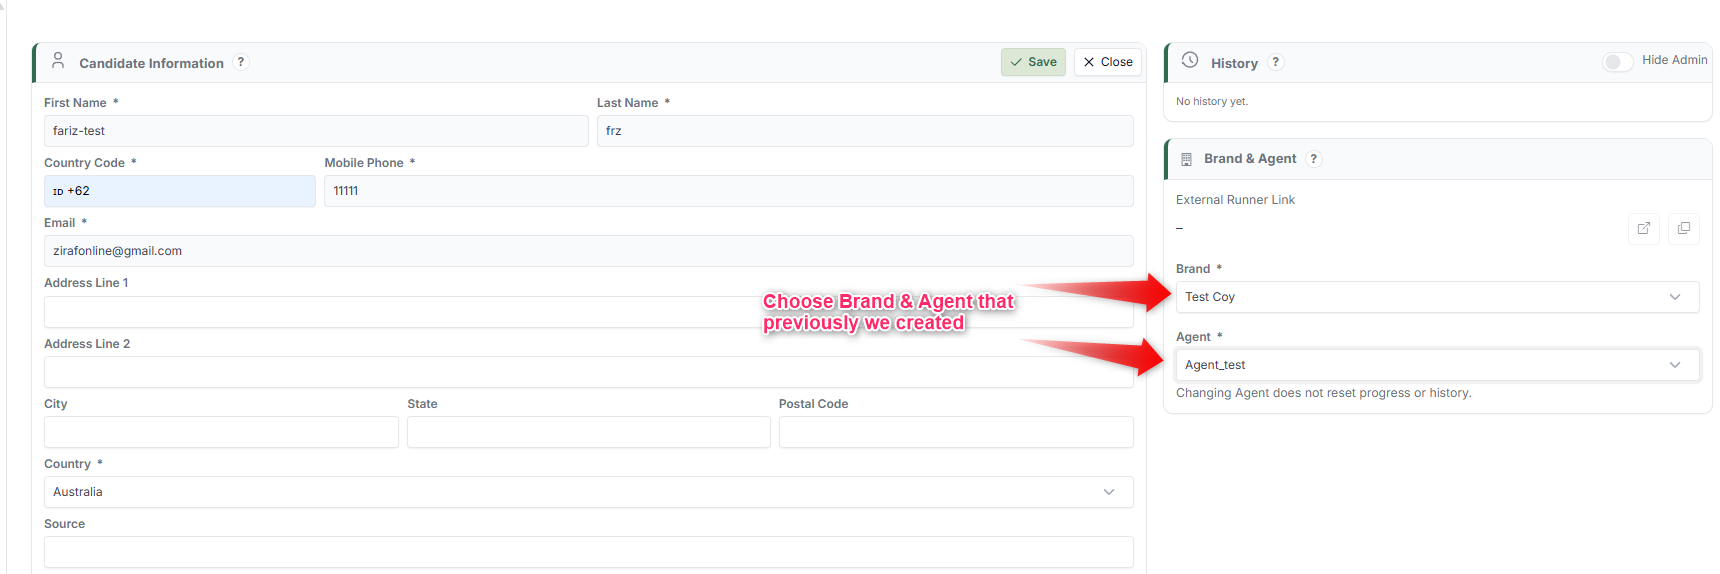 The Candidate is now linked to your Agent and ready to go through the Steps you created.
5. Test with the Runner #
- Open the Candidate record.
- On the right-hand panel, locate the External Runner Link in the Brand & Agent section.
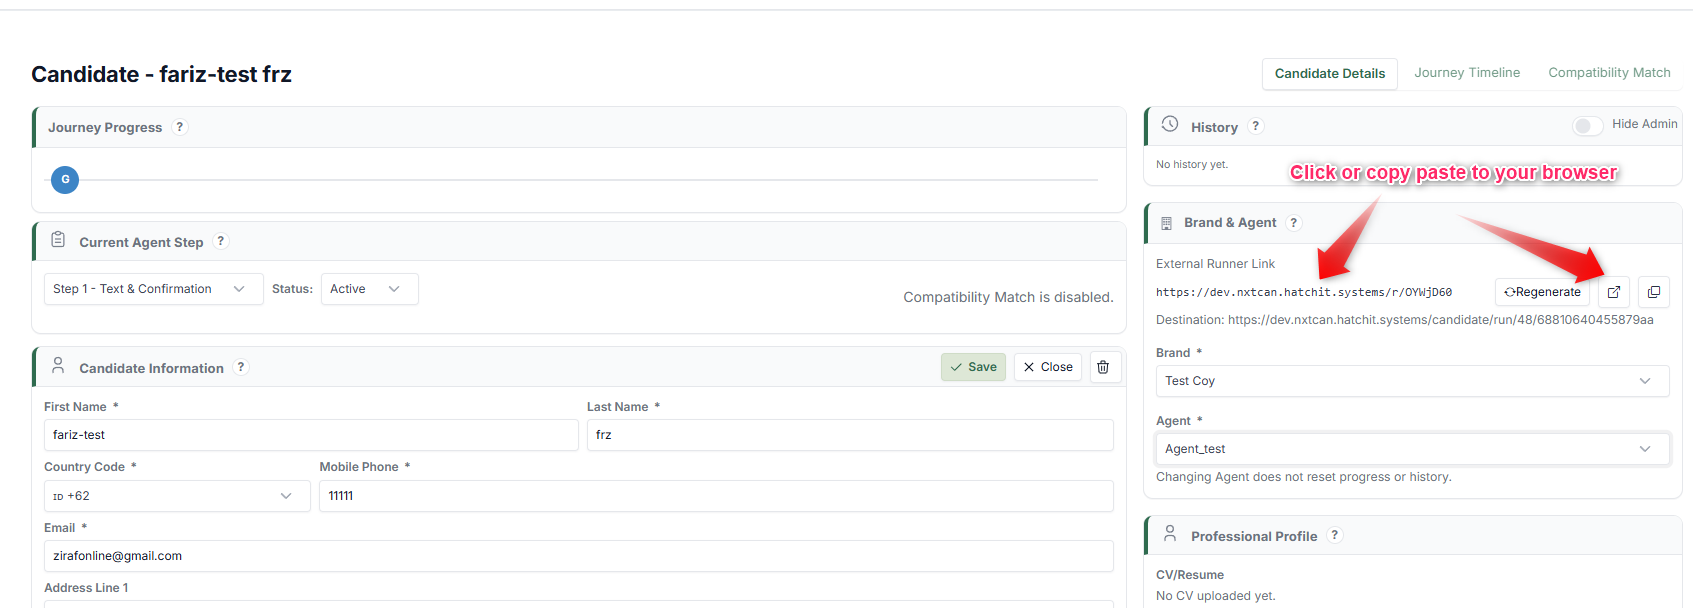
- Click the open icon, or copy the link and paste it into your browser.
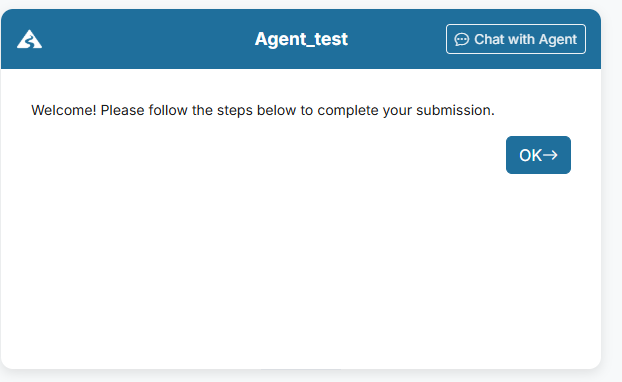
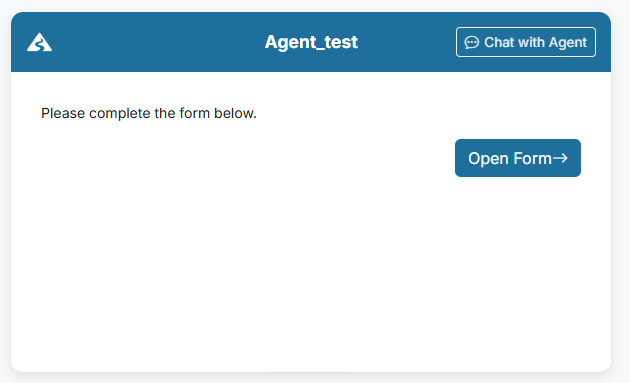
The Runner launches and displays the Journey from the Candidate's perspective. Go through each Step to verify that your flow works as expected.
6. Refine Your Flow #
After testing, return to the Path Steps section to adjust your flow:
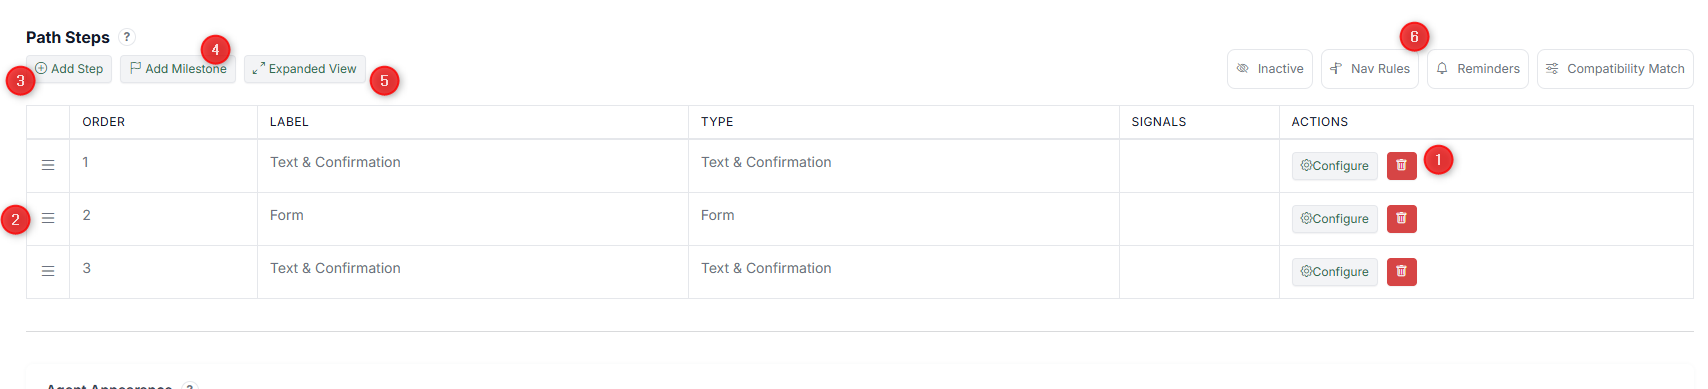 - Edit a Step — Click the Configure button on the Step you want to modify
- Remove a Step — Delete any Step that is no longer needed
- Reorder Steps — Drag Steps to change their sequence
- Add new Steps — Click Add Step to insert additional actions
- Add a Milestone — Click Add Milestone to mark key progress points
You can also configure Navigation Rules, Reminders, and Compatibility Match depending on your needs.
After making changes, test the Journey again using the Runner to verify your updated flow.
What You Have Achieved #
You now have:
- A working Agent assigned to a Brand
- A defined Path with a sequence of Steps
- A test Candidate moving through the Journey
What to Do Next #
- Add more Steps to build a complete process (see the Steps Configuration Guide)
- Configure a Gate to start Journeys automatically from external data
- Set up Compatibility Match to evaluate Candidate fit
- Define Outcomes to control how Journeys end
- Customise the visual experience with Agent Appearance