Overview #
Milestones are used to structure the Journey into meaningful stages. They do not require action from the Candidate, but help:
- Organise Steps into sections
- Track progress at a higher level
- Improve visibility in the Journey Timeline
How It Works #
At a high level:
- You insert a Milestone into the Path
- It sits between Steps
- The Candidate progresses through it automatically
- It appears as a marker in the Journey
How to Add a Milestone #
- Open your Agent in the Agent Editor.
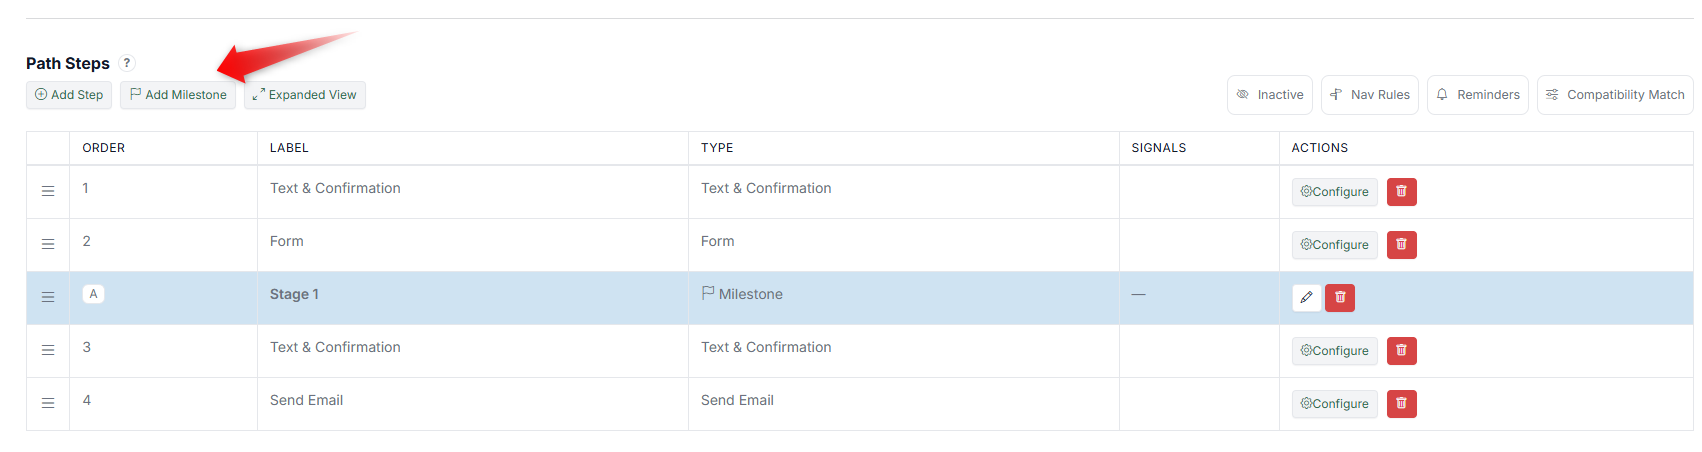
- Go to the Path Steps section.
- Click Add Milestone.
- A new Milestone row appears in the flow.
- Give it a clear label (e.g., "Stage 1," "Review," "Approval").
- Drag to position it where needed.
- Click Save.
The Milestone is now part of your Path and will appear in the Journey Timeline.
How It Appears in the Journey #
Milestones appear in the Candidate's Journey as structural markers.
- They separate different phases of the Journey
- They help identify where the Candidate is within a larger process
- They improve readability in the Journey Timeline
What the Candidate Sees #
Milestones are not interactive. The Candidate:
- Does not complete a Milestone
- Moves through it automatically
- Experiences it as part of the overall flow
When to Use Milestones #
Use Milestones when you want to:
- Break long Journeys into stages
- Highlight key phases (e.g., Application, Review, Outcome)
- Improve internal tracking and visibility
Why This Matters #
- Makes complex Journeys easier to understand
- Helps teams track progress more clearly
- Adds structure without adding friction